how to find out what program is making sound
| App | Toll | Best for | Download | |
|---|---|---|---|---|
| Movavi Video Editor Plus | Gratuitous trial, lifetime – $59.95 | Users who want pro-level editing with an easy interface | Download for Free | Download for Complimentary |
| Windows Movie Maker | Free | Users of older Windows devices | Read More than | Read More |
| iMovie | Costless | Users of Apple devices | Read More | Read More |
| VideoLouder | Gratis | Users who desire to increase a video book online | Read More than | Read More |
| Movavi Clips for iOS | Free (in-app purchases) | Users of iOS devices | Read More | Read More |
| Movavi Clips for Android | Free (in-app purchases) | Users of Android devices | Read More | Read More |
Our special pick to recommend when looking for a video volume booster or video book editor is Movavi Video Editor Plus. Information technology's a really easy-to-use video audio amplifier that tin can let you to enhance the audio in a video in a matter of seconds via a well-made, beginner-friendly user interface. What's more than, you tin can utilise the program for free with a seven-day trial to test it out with no commitments.
If yous buy the full version of Movavi Video Editor Plus, you'll be able to enjoy a broad range of boosted editing features to raise and accommodate your videos, such equally trimming, cutting, joining, and more. Movavi Video Editor Plus also offers professional person-level editing tools similar transitions, filters, and downloadable effects from the Movavi Furnishings Store to accept your editing to the next level.
How to increase a video volume with Movavi Video Editor Plus
OS: Windows, Mac
Cost: Free trial, lifetime – $59.95
All-time for: Users who desire pro-level editing with an easy interface
To alter the video sound settings on a desktop, use Movavi Video Editor Plus. With this video and audio editor, you can edit video files, brand a cracking movie, and immediately salvage information technology in any popular format. From the guide beneath, you'll larn how to increase the volume of a video.
Pros:
- Very easy to use
- Useful for cutting, trimming, cropping, and adjusting videos
- Advanced editing features like filters, titles, and transitions
Cons:
- Watermark when using the free version
- Yous take to pay to unlock all the features
- Complimentary trial only lasts 7 days
Pace 1. Install the Movavi sound enhancer
Run the downloaded file and follow the instructions on your computer screen to complete the installation.
Step 2. Add together your clip
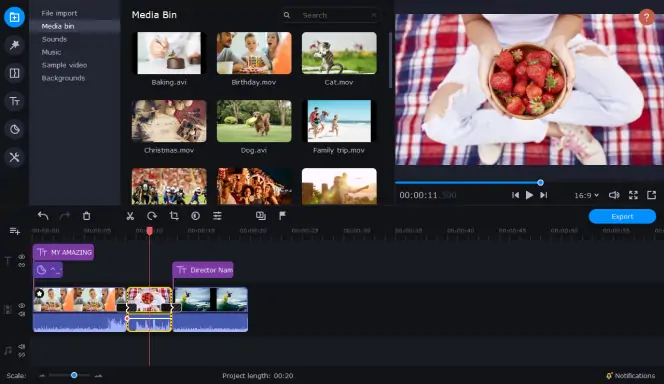
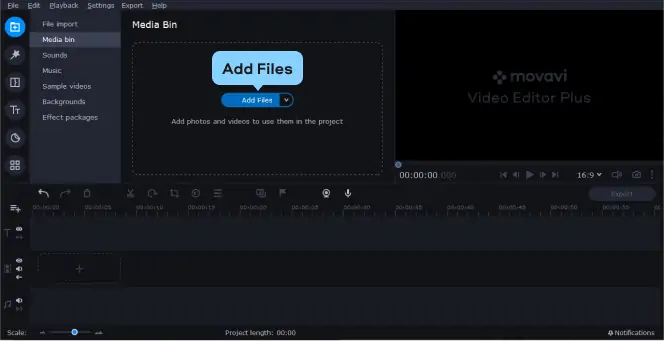
Start the book editor, click Add together Files and find the video clip in which yous desire to heighten the volume. The prune volition announced in the Media Bin. Drag and drop the files from the Media Bin to the Timeline.
Footstep 3. Boost the volume of the video
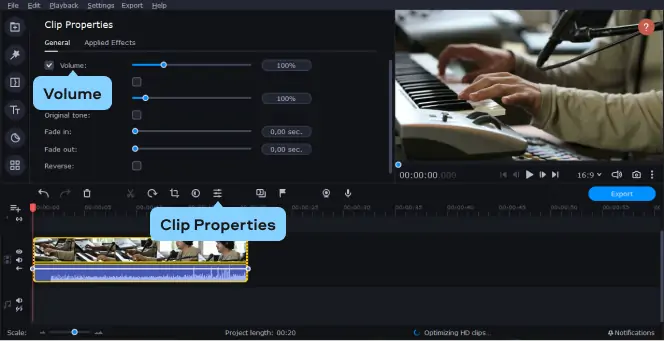
Select the added file and click Clip Properties with a cogwheel icon. In the Video tab of the audio increaser, but change the Volume setting to make the video louder.
Step four. Save Your Edited Video
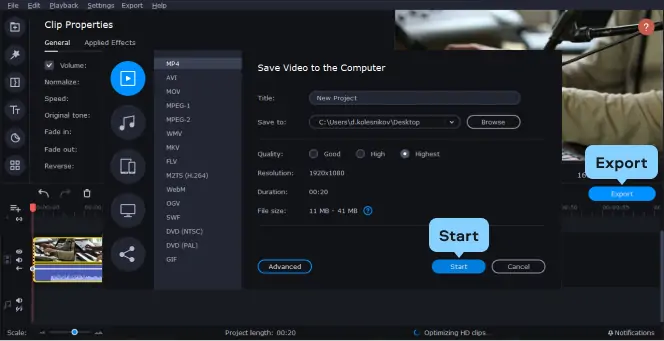
Click the Export button in the lower right-paw corner of the app. In the open dialog box, choose the appropriate settings category and the desired format for your edited video: MP4, WMV, AVI, MKV, 3GP, and more. Click Start to relieve your video in the destination folder. That'south how easy information technology is to increase a video book with Movavi.
How to use the congenital-in Windows video sound booster
OS: Windows
Price: Free
All-time for: Users of older Windows devices
Everybody knows Windows Movie Maker – it'southward one of the most popular programs for beginner video creators and one of the easiest to main. With Windows Motion-picture show Maker, you can quickly create nice-looking films using uncomplicated drag-and-drop controls. This video sound booster allows you to add effects, titles, transitions, music, likewise equally increase the book of your video. If you need capable video editing software for free, but you are non interested in spending hours figuring out the ins and outs of a program, Windows Movie Maker could be your choice.
However, nowadays, it'south hard to discover an installation file for the program. Windows Movie Maker was non updated since 2012 – Windows 8 and Windows 10 were released without this program. So, if yous're looking for a video-editing app for newer Windows versions, you'll have to look elsewhere. The company that created Windows Movie Maker recommends non downloading this application from 3rd-party sites, as the download may come with viruses or malware. Just if you're lucky to maintain Windows XP on your computer, you can test this software also. Except for all the other features, this video music editor can assistance you increase the volume of your video. Here's the short guide on how to enhance audio in a video.
Pros:
- Free to use
- Built-in by default for users on older Windows devices
- Very beginner-friendly with a smart and simple user interface
Cons:
- Not suitable for users of other operating systems
- Discontinued in 2017
- Doesn't appear on new Windows 10 devices
Step i. Add your audio to the app
First, y'all need to ready the audio files that you want to apply in your movie or slideshow. Please notation their format: Movie Maker does not support all extensions. If everything is ready, then we will further consider how to add music to a video. To load a sound file, select Import Audio or Music on the taskbar. Select ane or more files that yous want to utilise in your movie and click the Import button to insert the music. The track will appear in the compilation. To add together it directly to your photo or video, drag the file onto the timeline and drop information technology where the sound volition start playing.
Step 2. Get rid of the unneeded parts (optional)
It is not necessary to utilise the unabridged track; if desired, you can cut information technology on both sides. To do this, move the mouse pointer over the beginning or terminate of the track and, when the double ruby-red arrow appears, drag it in.
To move a track along the scale, left-click somewhere in the middle of the rails and move it to the right or left. Focus on the bluish bar. Add more music themes to the timeline equally needed. Now scroll to the very end. If the sound runway is longer than the visual sequence, information technology will have to be cut because when the video or images are finished, the sound will continue to play against the background of a blank screen. To avert this, click on the endpoint of the last audio track and drag it to the left until information technology matches the last clip in the get-go track.
This is how the endings of both tracks should look and then that the visual and musical content of the movie ends at the aforementioned time.
Step iii. Arrange the sound level
Now you need to increase the video volume. To do this, correct-click on the audio fragment and in the driblet-downward menu, select the item Volume. A pocket-sized window will open where you demand to take hold of the volume slider and motion information technology to the correct or left, depending on whether you lot want to make the sound louder or, conversely, quieter. In the same menu, you tin fix a smooth beginning and cease of sound recording. To exercise this, click on the item Fade in or Fade out or check both of them. The first command adjusts a gradual increase in the book of the music, and the second – a gradual decrease. Using these features will ensure a smooth transition from ane vocal to another, which is more pleasing to the ears than sharp cuts and the beginning of audio recordings.
As you lot tin encounter, making your videos louder using the Windows MP4 volume booster is not difficult at all.
How to brand a video louder with iMovie
Bone: Mac, iOS
Cost: Free
All-time for: Users of Apple devices
This is freeware for quality video editing, and information technology is available on every new Mac (Bone X). Hence, as it comes for costless, you don't have to pay for information technology. iMovie is compatible and tin exist used with a lot of iOS devices like iPod touch, iPad Mini, and iPhone also. This free video volume booster lets you perform many functions like importing photos and videos to your MacBook using the FireWire interface or through USB, and with information technology, video clips up to 4k can be edited; you tin can add effects or whatsoever music of your choice as well. As i of the all-time, iMovie comes with height features like a movie trailer, audio editing, and many others. In general, the iMovie interface is quite easy-to-understand. It is organized clearly, and only several buttons help y'all to create your picture. Yous tin share the results with your friends right from the program. Amidst other features, iMovie provides several ways to increment the book of video and audio clips. Yous can increment the volume of any audio or video clip in the project and any event video prune, also as adjust the volume of private sections of the clip. This characteristic gives you precise control over your audio: you lot can put sound accents anywhere in the project.
Pros:
- Ideal for Apple tree users on devices similar Macs and iPhones
- Free to apply across all Apple devices
- Precise control over sound volume
Cons:
- Not suitable for users on Windows or other platforms
- Interface takes a fiddling fourth dimension to get used to
- Not the most beginner-friendly option
Stride 1. Open the Audio Adjustments window
To open up the Audio Adjustments window, click on a prune, and and so click the Audio Adjustments button. If one clip is besides loud compared to the other clips, you can simply increase the volume of the prune.
Step ii. Adapt the volume level
To suit the volume of a clip, click on a clip to select information technology. In the Sound Adjustments window, drag the volume slider to the level you want. Finally, click Done. The audio settings icon appears at the beginning of the clip. You can choose this icon to open up the audio settings window and and so change or delete the audio settings you take prepare. You can restore the original volume of the prune by clicking Revert to Original.
Step 3. Normalize the sound volume (optional)
Normalizing the volume of a clip If the subject area is talking too loudly in 1 clip and too loud in another quietly, volume normalization volition allow you to set the volume of your clips according to the volume level yous prefer. To normalize the volume of clips, click a prune to select it with the Audio Adjustments window open. Click Normalize Volume. This setting sets the maximum volume of clips without distortion. Select another prune and and so click Normalize Volume again. The volume of the two clips is adjusted to the same level.
How to increase a video volume online
Os: Any
Price: Free
Best for: Users who want to increase video volume online
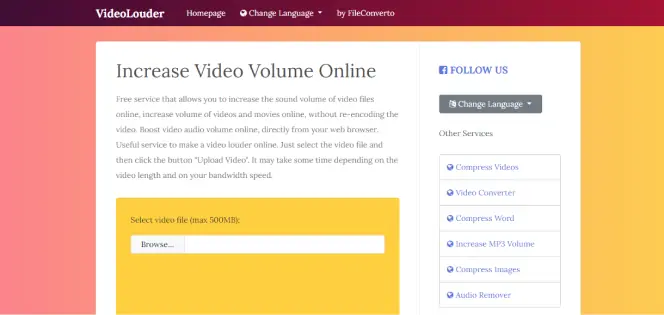
Sometimes the book of the playback device is non sufficient to play a tranquillity video. To gear up that, you would need to find a special app. Unfortunately, in that location are practically no Net resource that allow you lot to add volume to the sound, since they are quite difficult to implement. But don't worry – in that location is a mode to increase the video volume online, and that's the VideoLouder website.
Pros:
- Easy-to-use video volume booster online
- Works on whatever platform or device
- No downloads or installs needed
Cons:
- Can be slow to procedure depending on internet speed
- Requires internet connectedness to use
- Max file size 500MB
Pace ane. Go to VideoLouder website
Open the main page of the site by following the link below. Scroll downward the tab and click on the Browse push to start downloading the files. It should exist borne in mind that the weight of the tape should not exceed 500 MB.
Go to the VideoLouder website
The browser volition start, then y'all should select the necessary object and click Open up.
Pace ii. Arrange the volume in your video
From the Select an Action pop-up list, select Increment volume. Set the required option in Decibels. The desired value for each video is selected individually, especially if there are several audio sources in it. The best selection to increase the volume of dialogues is 20 dB, for music – ten dB, and if there are many sources, it is better to choose an boilerplate value of 40 dB.
Step 3. Get your video prune
Left-click on Upload File. Look until the processing is complete and click on the link that appears to download the processed video to your computer.
Now y'all can start viewing by launching the downloaded object through any convenient player. Equally you can come across, it took only a few minutes to utilize the VideoLouder MP3 video booster to increase the volume of the video to the desired value.
Using a video volume increaser on an iPhone
OS: iOS
Price: Complimentary
Best for: Users of iOS devices
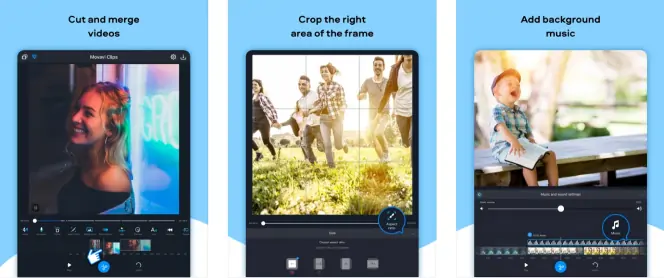
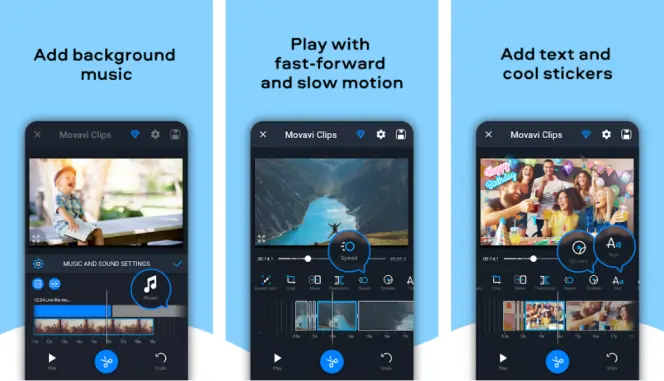
If you utilise an iPhone, endeavour Movavi Clips. This multifunctional video editor for iOS tin make your video sound louder in just a few taps. There are also multiple video effects that you tin employ to add together some excitement to your movie. Here are some guidelines for irresolute sound levels.
Pros:
- Easy to use
- Completely free for iOS users
- Also offers cropping, trimming, and merging
Cons:
- Some in-app purchases needed to get full functionality
- Watermark when using gratis version
- Some users study bugs
Become Movavi Clips for iOS
Stride 1. Upload your video
Run the video book increaser and upload your video file by clicking the Plus button at the bottom. Choose Video, define the aspect ratio, and select the video you desire to be louder. Touch Start editing.
Footstep 2. Make the video audio louder
Tap the Sound icon on the toolbar. Move the Video volume slider to the correct to increase the volume. Touch Play to listen to your video with the new audio level. Arrange the sound until y'all like it, then tap the Check marker icon.
Step 3. Save the resulting footage
Tap the Save icon. You lot'll see a new window with previews of your video. Touch Salve one more time and wait for a few moments. Your video is set to rock!
At present yous know how to make a video louder on an iPhone. Hither's a guide for Android phones.
Using a video volume editor on an Android device
OS: Android
Price: Free
All-time for: Users of Android devices
To adjust the video book on Android phones, you lot may too need an appropriate mobile video volume editor. Go Movavi Clips and take control of your video: non merely the volume, but many other parameters, too. The easy steps below will help you to meliorate the sound in your video.
Pros:
- Free to employ
- PC-like editing on your phone
- Boosted editing tools like cut and merging
Cons:
- Requires in-app purchases to access certain features
- Watermark when using free version
- Performance varies depending on your device
Get Movavi Clips for Androind
Step 1. Add your video file
Tap the Movavi Clips icon. After the program has loaded, add your file by tapping the Plus button. Touch the Video icon, select the video you want to alter, find the First editing button at the lesser, and tap it. Specify your preferred aspect ratio.
Step 2. Increase the Video Volume
The sound settings can exist changed in the Sound tab. There, tap the Cogwheel icon and define the new video volume by moving the Video volume slider to the right. The Play push button volition aid you to choose the volume needed. If y'all like the consequence, tap the Cheque mark push.
Step 3. Save the Consequence
Touch the Floppy disk icon at the pinnacle correct. On the next screen, tap Save. Your video will exist fix in no time! That'south how you brand audio louder on Android.
Useful tips on video sound
Nowadays, many people have YouTube channels where they mail service videos on thousands of unlike topics. The threshold for entering the world of vlogging is much lower: you but pick up your mobile phone and commencement filming. Most video bloggers started their careers this way.
The audience is growing post-obit interesting content, and the quality of sound and video in video blogs has not afflicted the number of views for a long time. But information technology is like shooting fish in a barrel to lose a viewer if, in society to understand the speech communication in your video, he has to make an try: it is easy to detect a lot of videos on any topic on the Internet that is interesting to watch.
The sound on the TV, in theaters, and on YouTube is very unlike. This is due to the setting and format: TVs almost never have a built-in subwoofer and it is rash to look uniform depression frequencies from it. In the cinema hall, hardly anyone will play, make clean, or cook food in parallel with the viewing.
YouTube videos are mainly watched from the screens of mobile phones, and as you tin can imagine, the speaker systems are different everywhere. One thing is important for a video blog: the presenter'south voice should be legible and heard even on mobile phones.
When recording audio at abode or outdoors, pay attention to ambient noises. It is enough to close the window and door to the next room and turn off the computer at dwelling house. Outdoors – choose a location abroad from highways or noisy places. If you take to record a video in a noisy place, try to place the microphone closer to the presenter. Tape the sound break – silence, space. Background sounds will surely get into information technology, simply it volition exist easier to fill in voids past sound with this phonogram during editing.
Preparing for the recording
The number one trouble with sound recording is the reflection of sounds from objects around you lot, concrete walls, parquet floors, windows, and others. The echo is created that spoils the terminal recording.
Instead of centering the room, movement to the wall that has a coating or carpet. If the house has a dressing room, then there is no better place to record. Clothes will blot sound, which means that nothing superfluous will come up out on the recording.
The all-time recordings are created in the quietest environs possible. Make sure that there is no or minimal racket around you before you first recording. Plow off all the objects that produce dissonance – even the quietest ones.
To get the near intense musical experience, you need to position your monitors correctly. Imagine a perfect triangle with your caput and each speaker at the summit. Using a record measure, lanyard, or fifty-fifty an audio cable, measure out the distance between the two monitors and then make certain the distance from each monitor to your position is the same. In the future, try to sit at this signal when listening and recording.
The distance betwixt the speaker and the capsule of a condenser microphone is important and can greatly affect the tonality of a recorded voice. The closer you get, the more the microphone emphasizes low frequencies and creates an outcome called the "proximity effect". To avoid the effect of proximity, the speaker should be positioned about 15 centimeters from the microphone, and the grouping of podcasters may be seated even further to create a "give-and-take in the room" issue. We advise you to experiment to find the perfect sounding distance.
Technical equipment
When using a bi-directional and omnidirectional microphone, accept intendance to apply reflectors that minimize the book from behind or from the sides. If you lot use a unidirectional microphone (which captures audio merely from the front), then information technology is improve to place the reflector behind the speaker - this way, you will remove all unnecessary sounds that may announced behind your back.
If you don't accept the budget for professional solutions, using a thick bedspread or coating on the wall or closet behind the speaker can create the perfect recording environment. The main thing is to close as large an expanse as possible.
Headphones and monitors have their pros and cons, and so information technology's best to know when to use what. Monitors are ideal for listening and mixing - they will allow you to understand the sound of your recording on about sound devices. But while recording, information technology is better to employ headphones – in this instance, the sound from the microphone volition non be duplicated when leaving the monitor.
Using closed headphones such equally Mix-Fi during recording will aid control-click tracks and virtual channels then that they do not fall into the microphone - and fifty-fifty with the coolest soundproofing that allows you to focus on the recording. Open-back headphones are platonic for sound evaluation and mixing tests - these headphones allow air to menstruum freely to the speakers and make it richer.
Sound processing
Later on recording, the sound must be synchronized with the image. It is improve to practice this in the editing program for each shot taken. It is not known which of the frames may be useful to you. After adding takes, start cleaning the soundtrack. It is recommended that you lot do this after synchronizing the sound with the image. Consider the fashion and genre of your video. Information technology is better to keep the genre peculiarities and not attempt to fit into the video everything that you accept learned in video and audio.
For further references in sound processing, visit the following pages:
How to make a vocalization-over video
How to remove groundwork noise


Movavi Video Editor Plus
Make videos. Create. Inspire.
* The free version of Movavi Video Editor Plus has the following restrictions: 7-day trial period, watermark on the output videos, and, if you're saving a project every bit an audio file, an ability to salvage only one-half the sound length. Learn more
Often asked questions
How tin can I increase the volume of a video file?
There are several means to boost the video volume. If you lot apply Windows Moving-picture show Maker, y'all tin can adjust the sound in your clip for free. First, add together your video to the app. To suit the book, you can correct-click the video on the timeline and cull Video Volume in the drib-down carte du jour. A pocket-size window will open where you lot tin movement the volume slider to the right, if you desire to make the audio louder.
Some other style to brand your video louder is to utilise Movavi Video Editor Plus. It'due south too like shooting fish in a barrel: but add together your files to the app, click the cogwheel icon to find the video properties. In the Video tab, find the Book section and so adjust the settings according to your taste.
How practice I increment the volume of an MP4 video?
You tin can arrange the volume of your MP4 clip with Movavi Video Editor Plus. To do this, just add your file to the app, find the cogwheel icon and click it to open the Prune Properties tab. In that location, find Volume and elevate the corresponding slider until y'all're satisfied with the result.
How practice I increase the volume of a recording?
Y'all tin do this online and offline. If you prefer at present to download the additional apps, VideoLouder may assistance. To adjust the book of your clip, add your recording to the online service by clicking the Browse button. As it's done, select Increase volume and put the needed book level in decibels. When everything is finished, click Upload File to get the resulting footage.
If you prefer a desktop app, you may try Movavi Video Editor Plus. Increasing the volume in this program is really easy. To practise this, add your recording to the program, then detect the Clip Properties icon. In the window that appears, find the Volume section and adjust the volume level using the slider.
flanneryforad1979.blogspot.com
Source: https://www.movavi.com/support/how-to/how-to-make-video-louder.html